
Just when you thought your project had reached peak management, in comes one of Trello’s Power-Ups that allow users to optimize their workflow — Custom Fields. A great visual tool for easier collaboration, other perks include adding more context to each task and keeping track of time and duration.
Because these at-a-glance visual badges aren’t exclusive to one product, we’ll also include an alternative solution with Zenkit for those looking for even more options in their custom fields.
What Are Custom Fields?
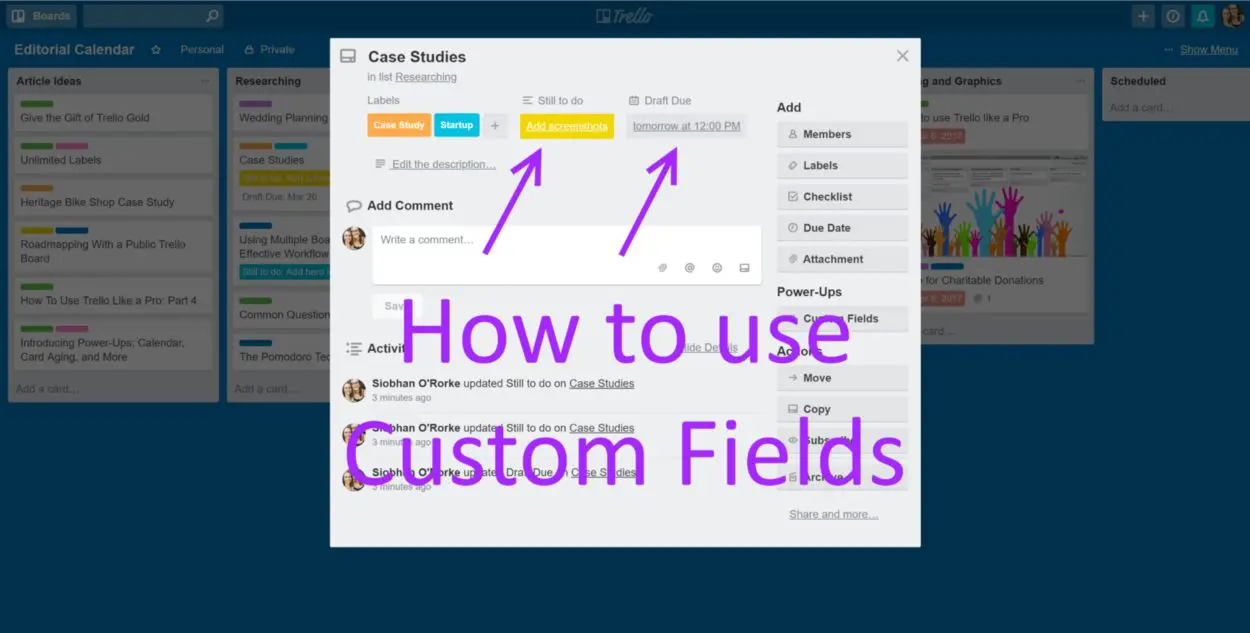
Custom Fields are a Trello Power-Up (how you bring additional features and integrate apps into your board) that offer cards more functionality. Not only do they provide more context, but they also bring process and formality to your workflow. Whether it’s to emphasize different levels of priority or a way to track feature requests, Trello’s Custom Fields won’t disappoint. Here’s how they can help:
- Add start and end dates to track duration, such as a campaign
- …Or any kind of numerical value, eg. order numbers, prices
- Feature a drop-down list of options
- Export Custom Field data, restricted to Business Class and Enterprise accounts only
- Include checkbox to cards — imagine how satisfying that would be?
Creating Custom Fields in Trello
Now that you know what they are, you’ll need to know how to create them on your Trello board. Here’s a step-by-step guide:
Step 1:
First thing’s first, you need to enable the Custom Fields Power-Up. To do this, go to the Power-Ups directory, and then you’ll see it under the Board Utilities category.
Step 2:
Once you’ve enabled the Power-Up feature, you can click the Custom Fields button, which is located on the back of the card, to add a new field. Once enabled, it shows on both the back and the front of your card.
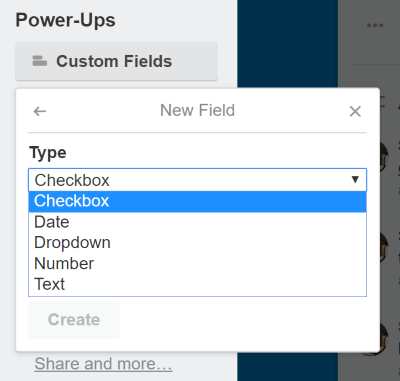
“Type” indicates what you can input for the field. Your options include ‘Date’, ‘Dropdown’, ‘Number, and ‘Text’.
“Name” is 25 characters long and is the moniker for your field.
Step 3:
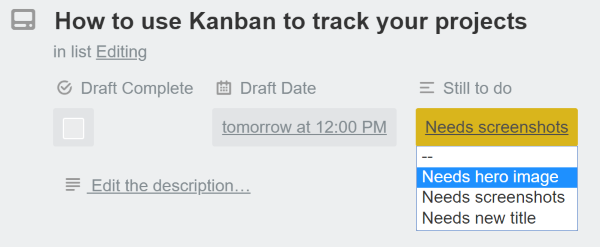
Enter values for your fields by clicking on the field at the back of the card. To edit the entry, click on the Custom Field Power-Up button — this will also change its name of it.
To disable the Power-Up, simply go to the directory and enter the ‘Enabled’ section, click on the gear icon and choose ‘Disable’.
Trello Custom Fields Examples
Whatever your project, there are many ways to utilize this Power-Up feature. including the following examples:
- Due dates: Editorial teams can use the Date Field to include due dates and deadlines when using cards to represent article topics.
- Performance indicator: Teams who use their Trello boards to measure employee performance could include star emojis to their Text Field to rate accomplishments.
- Inventory costs: Keep track of expenses by utilizing the Number Field to highlight inventory costs.
- Account information: By using Custom Fields for added information such as email address, contact numbers
Keen for More Options? Here’s the Alternative Solution…
It’s always great to have options. Whether this means trying out a new product, or if said product had more ways for you to customize your cards.
Every field in Zenkit is a Custom Field, and it comes with 11 options to enable you to include all kinds of additional information, from extra dates to labelling costs. You can also sort and filter your data, as well as use special functions such as formulas and references. Oh, and they come at no extra cost!
Adding Custom Fields in Zenkit is as easy as it is in Trello. Here’s how:
- Click on an item to open it.
- Open the item menu (…), then click ‘add Custom Field’ and choose one from the list
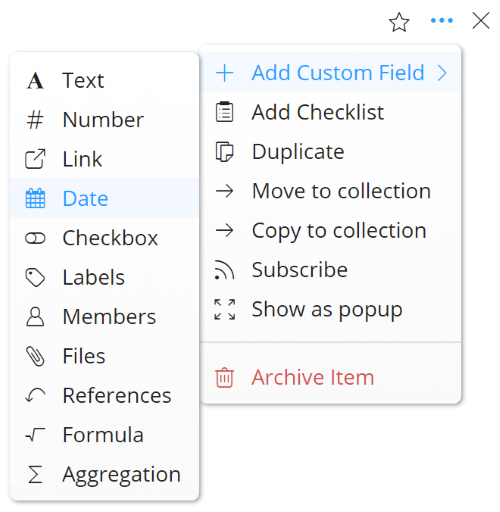
- Alternatively, you can click ‘add Custom Field’ at the bottom of an item
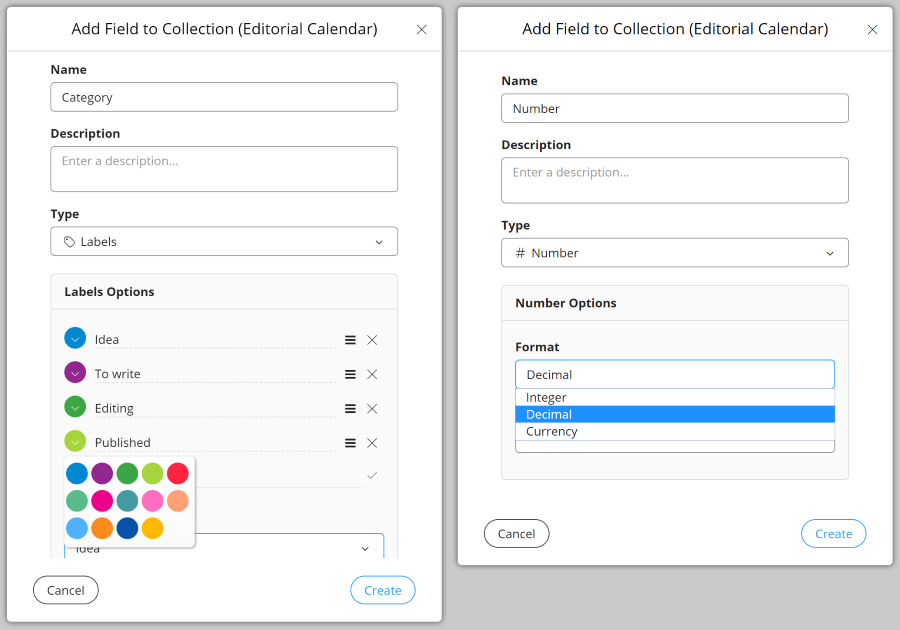
- You can edit the field properties in the popup whenever you add a new field. Give a name and description to each Field.
Tip: Use the Description to explain to fellow team members how that particular Field should be used. It’s a handy way to get your message across!
Each field has different properties. For instance, the number field allows you to depict decimals, integers, and currencies (which has a drop-down menu filled with various options), and the label field (which is one of Zenkit’s more important custom fields, as it allows you to categorize your data in as many ways as you need to) enables you to classify data with different colours — how’s that for options?
Here’s a further rundown on what they all feature (please excuse the old design!):
Signing up to Zenkit is free for individual use or for a small team of 5 or fewer people, so why not give custom fields a go?
If you’re already a custom field convert, don’t forget to let us know what you think!
Cheers,
Dinnie and the Zenkit Team




Leave a Reply