Eat, Plan, Love: How to Manage Your Meals in Zenkit
Enjoy the perks of preparation!
It’s not just mothers and health enthusiasts that can benefit from planning their meals. In this article, we’ll illustrate the perks that can be enjoyed when planning ahead, and how it can all be done in Zenkit.
There are many reasons why people choose to plan their meals, from accommodating different dietary requirements, to optimizing time during the working week, or to prep for a special event. Whatever your reason, when done correctly, having this kind of structure can eliminate stress and allow you to truly enjoy the end result—eating.
“One cannot think well, love well, sleep well, if one has not dined well.” – Virginia Woolf
Planning your meals ahead of time can also bring along the following benefits:
- Avoid food waste
- Save money
- Add more variety to your meals
- Keep a well-balanced diet
Visualize Your Planning
We humans love anything that looks pretty, so displaying data visually makes all the more sense when trying to get organized.
One of Zenkit’s biggest assets is its multiple view options. The choice to view your data in various designs, such as a mind map, table, Kanban, or calendar, makes it a flexible enough system to suit any task or project.
While complying with the Kanban principles may not necessarily work for our meal planning extravaganza, its board and card system does make for a practical way to organize recipes.
Weeknight Dinner Ideas
Since moving out of my family home and becoming an adult, I’ve realised how much of a drag planning weeknight dinners can be (shoutout to my mother for feeding me day in, day out during childhood, adolescence, and let’s face it, much of early adulthood). After working all day, the last thing you want to think about is what to cook, and it’s this very reason why I’ve decided to implement a weeknight dinner planner into my life.
Here’s how I created it using Zenkit:
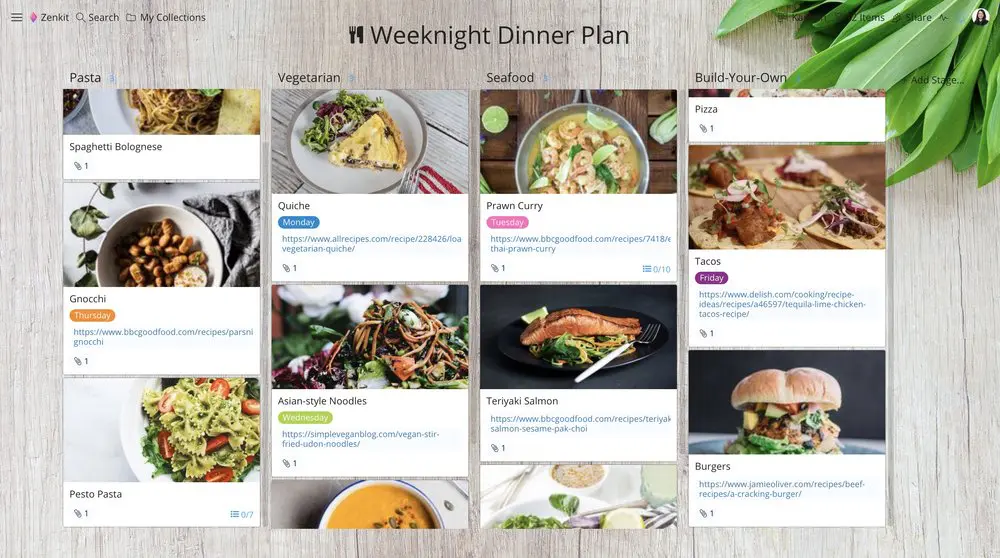
Step 1: Create a new collection, select the Kanban view option, and give your planner a name—I went for the very creative ‘Weeknight Dinner Plan’. Then start adding your recipes and/or dinner ideas as items. My planner is a combination of foolproof favourites as well as new recipes I’m eager to try out.
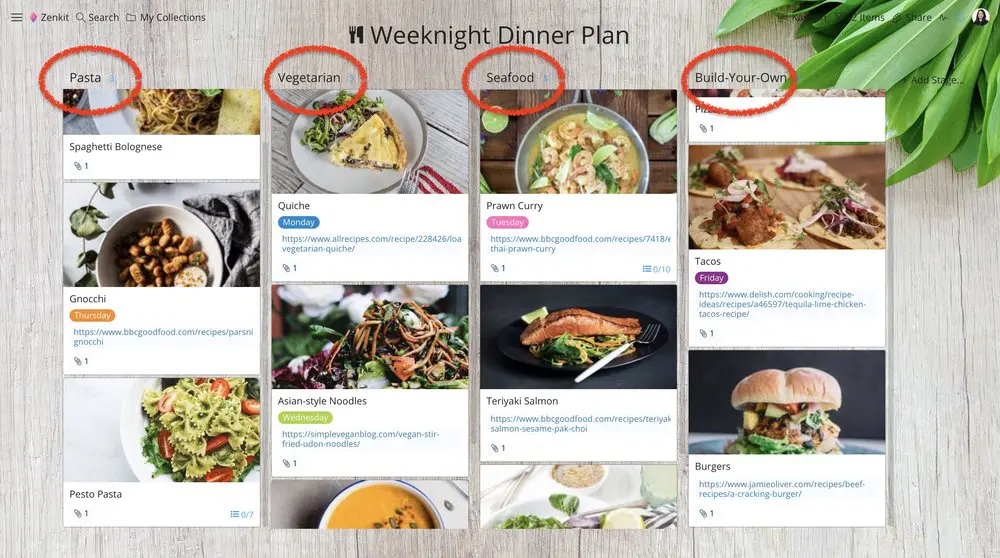
As you can see, I’ve divided the recipes into dietary types—pasta, vegetarian, seafood, and build-your-own. Of course, you can divide your recipes up in different ways, from how they’re cooked (slow-cooker, wok, oven) to how many ingredients they require (5 or less, 1,000 or more). The choice is yours.
Step 2: For those who are avid readers of my how-to’s (it’s never too late to start folks), you will know how much I rave about Zenkit’s custom fields. And for very good reason!
Custom fields can not only bring function and formality to your items but also context. Use the 11 options on offer to include all kinds of extra information that could help you with your planning.
For instance, the following are fields I implemented onto my planner that I felt would help me organize:
- A label field to determine which day of the week I allocate a recipe to.
- A file field to upload an image of the meal #inspo (whether or not it turns out to look the same is another story).
- A link field to include the websites where I sourced the recipes from.
- Or alternatively, a checklist feature already included in each item can be used to manually write out the ingredients and method. (You can cut and paste this directly from the website.)
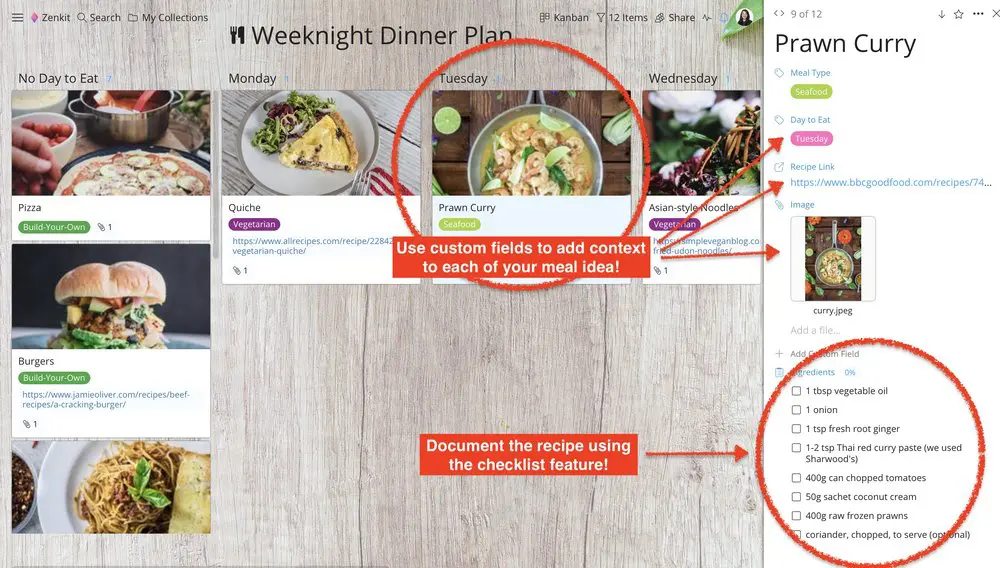
Adding a custom field is super easy. Simply click on an item, and then a panel will appear on the right-hand side or a box will appear in the centre of the page. This is where you can add all the extra information by adding new fields or renaming and changing default ones.
Tip: Do this before the working week starts so you can have all the ingredients ready and can prep ahead if needs be.
Note: The reason I chose to only include weeknight dinners is so that the weekend can be left open to enjoy going out to eat, take out, or spontaneous recipes to try.
Get this collection as a template: Weeknight Dinner Plan
Dinner Party Planning
Hosting a dinner party or some kind of special event that requires various meals for numerous people is another time having a meal planner could come in handy.
If you’ve ever hosted a dinner party, you know how much of a project it is. You have tasks to coordinate, people to satisfy, a deadline to work against, and usually a budget to stick to. The star of the show is the food you will serve. And being such an important element of your event, this is something you have to get right.
Here’s how I created a dinner party menu planner:
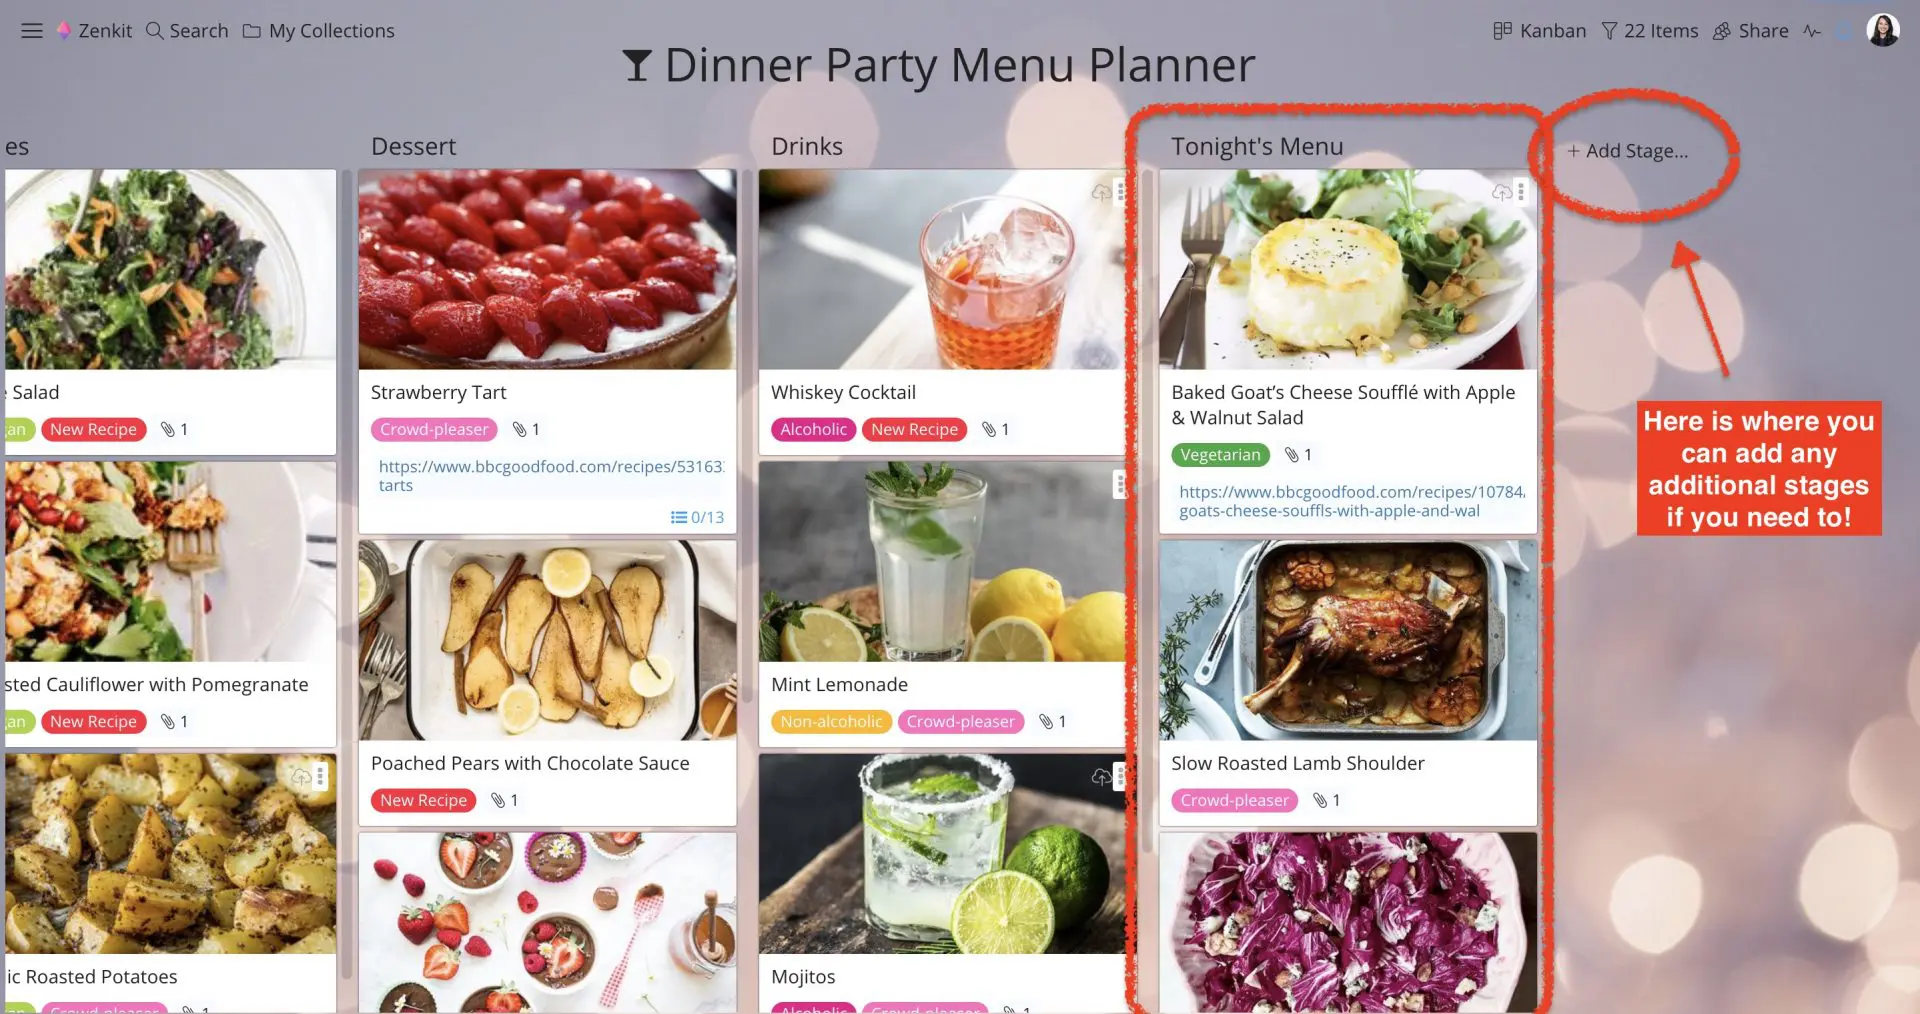
Step 1: My menu planner was created as a new Kanban collection with recipes and meal ideas divided into courses. Similar to my weeknight dinner plan, my dinner party menu planner consists of recipe favourites, as well as new recipes keen to be tested.

Step 2: Custom fields were once again used to include additional information for each recipe. Keep in mind that when hosting a dinner party, you have to cater to your guests, so I would recommend adding a label field that highlights dietary requirements.
In this planner, the following fields were used:
- A label field to determine which course a recipe belonged to, as well as the food/beverage type, and whether or not it’s a new recipe or a crowd favorite.
- A file field to upload an image of the meal #inspo.
- A link field to include the websites where I sourced the recipes from.
- Or alternatively, the checklist feature already included in each item can be used to manually write out the ingredients and method.

Step 3: In this planner, how I’ll determine what will be on the menu slightly differs to how weeknight meals were chosen.
Instead of using the label field, I added a column titled ‘Tonight’s Menu’ which selected recipes can be dragged to. Because hosting a dinner party usually entails more than one recipe, I figured this to be the most practical way to manage it.
Get this collection as a template: Dinner Party Menu Planner
Shopping List
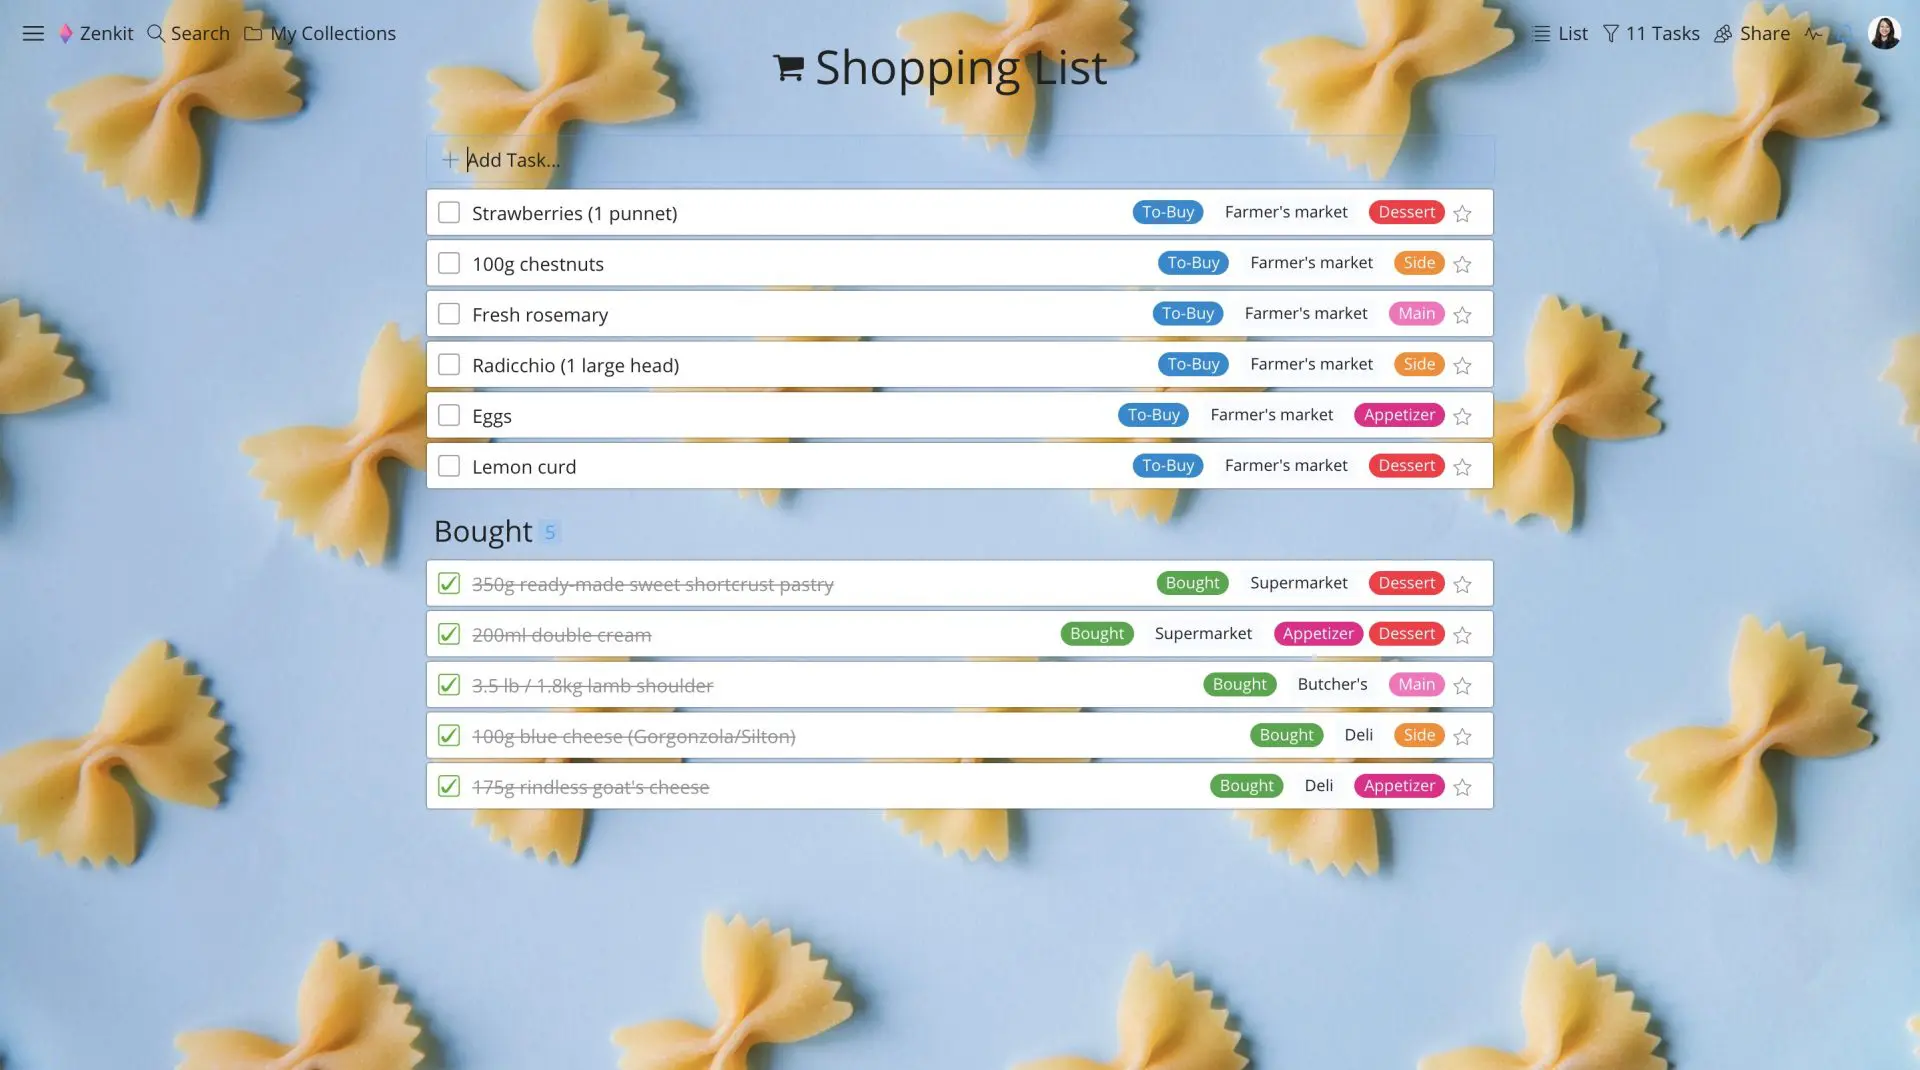
Another Zenkit feature that could be of massive use to your meal planning is the checklist. Create your shopping list by starting a new task view collection, then simply add the items one by one.
The fun doesn’t stop there!
Just like the Kanban view (and all other collection views), you can add custom fields to your list items. Including information such as ‘where to buy the items from’ and ‘what part of the meal the ingredients will be added to’ can prove to be useful in your shopping experience.
And because the app is available on mobile devices, you can cross items off your list as you shop.
Final Thoughts
The two-meal planner templates that were created and featured in this article are exactly that, templates. So, remember, no reason is too outrageous for wanting to implement a meal planner into your life. Simply start off with the steps I’ve suggested and then build from there if need be.
The beauty of Zenkit is that you can store up to 50,000 items in one account (that’s a whole lotta recipes!), use as many custom fields as you like, and switch up your design to create a plan customized to your taste.
If you have any other planner ideas, don’t forget to share your tips with us!
Cheers,
Dinnie and the Zenkit Team
FREE 20 MIN. CONSULTATION WITH A PROJECT MANAGEMENT EXPERT
Wanna see how to simplify your workflow with Zenkit in less than a day?
Book a Live Demo