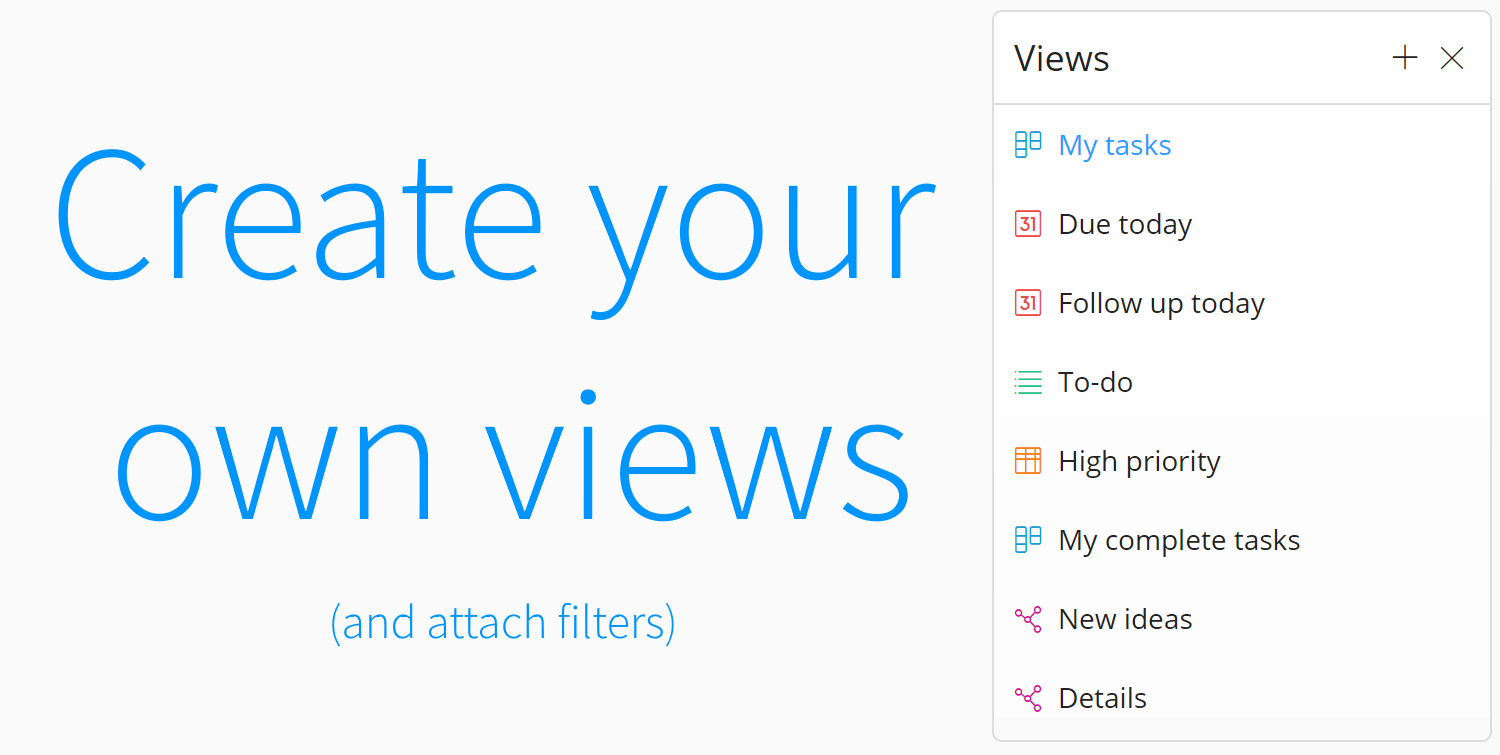
All-New, Totally Custom Views
Combine views with filters to access everything you need in a single click

Our top priority in building Zenkit was to make it flexible and easily customizable so that anyone using it could build the tools they needed to get their work done. There’s just something about being in charge of how your tools work for you that just makes it easier to get things done. We’re proud of what we’ve managed to achieve toward that goal so far.
Today’s release introduces a whole new way to customize your collections to make it easier for you to quickly access the data you need. Introducing….

Views!
Loads of you told us it would be a game-changer to be able to access a filter as soon as a collection opens, and that it would be awesome to connect filters to views. So we did both.
Well, actually these are just the same old views and filters you already know and love, with an extra layer of Zenkit magic. With the all-new views, you can:
- Create multiples of each view type
- Remove views you don’t need or use
- Change the order of views in your view menu
- And attach filters to views
That last point is the real killer here. With this update, you can attach a specific saved filter to a view you’ve set up, so that each time you access that view or open your collection, the filter will automatically be applied.
Views are all personal, so when you set up a new view, only you can see it. They’re designed to help you navigate through your collection and quickly change your focus without having to click through too many view and filter settings.
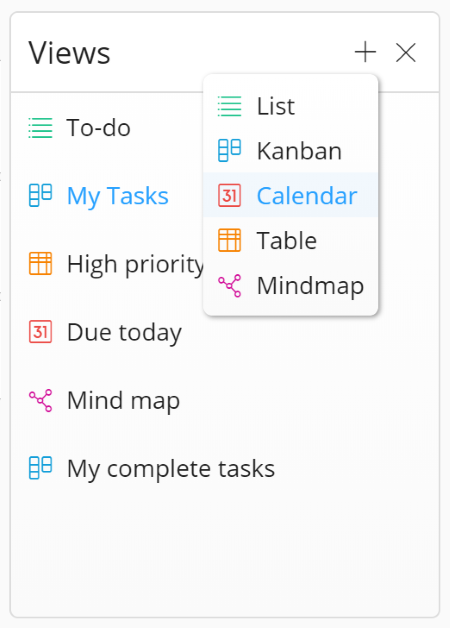
How to Add a New View
You’ll see a + icon at the top of your view menu or panel. Click on it and choose the view you’d like to add, then rename it, set up whatever options you want for that view (item size, Kanban grouping, visible columns, image location, etc) and you’re good to go!

To re-order them and bring your most-used views up to the top, simply drag and drop them.
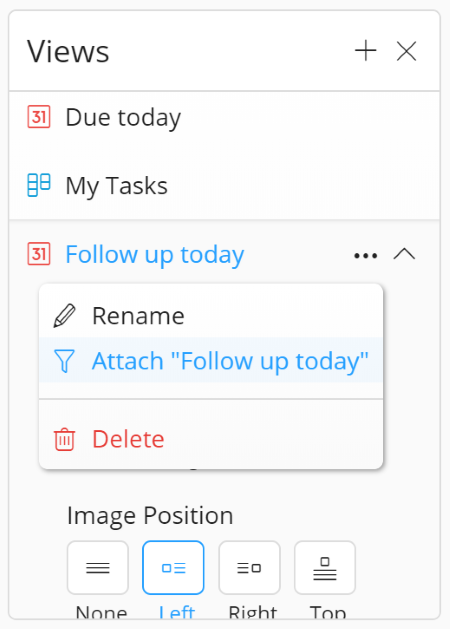
Attaching a Filter
If you want to attach a filter to your view, simply apply a saved filter, then go to your view options by clicking on the ‘V’ icon next to its name, hit the “…” icon and click “Attach “filter””.

Now whenever you go to that view, the filter is already applied and waiting for you to use it. You can navigate away or close your collection, and next time you return the filter will be there waiting for you.
One thing to note is that the filters you apply to a view are just the default filter for that view. Once you start working with other filters or adding new filter conditions, the default filter will no longer apply. To return to the original filter, just choose it from your list of saved filters.
Deleting a View
Not a big fan of tables? Don’t need a Kanban board for your study mind map? Mind maps not useful for your editorial calendar? Simply remove them! Deleting a view decreases the clutter and lets you focus on the tools you need.
To delete a view, just click on that same … icon in the view’s options, and choose ‘Delete’.
Learn more about how to create and customize your views in our documentation.
How You Can Use Custom Views
Since this is closely tied to filters, you can pretty much set up your views just like your favourite filters:
- A Kanban view that shows only tasks assigned to you in your team’s main tasks collection.
- A list view that shows your completed tasks so you can archive them at the end of the week.
- A table view that shows your biggest customers, sorted by lifetime value.
- A calendar view that shows all the people you’re supposed to follow up with today.
- A mind map that focuses on only one particular branch.
- A Kanban view that only shows high-priority tasks that are not yet complete.
I could go on thinking up ideas, but nobody knows what you’d use views for better than you do!
We hope you enjoy this latest update! Have a great idea? Let us know how you’ll be using your new views in the comments.
Cheers,
Siobhan and the Zenkit Team
FREE 20 MIN. CONSULTATION WITH A PROJECT MANAGEMENT EXPERT
Wanna see how to simplify your workflow with Zenkit in less than a day?
Book a Live Demo
The filter views are useful, but one feature they are missing is applying all of the filters to new items. It would make for a great workflow if items created while using a filter automatically had all of the filter conditions applied. For example, when using the new subitems feature and filtered to a specific parent, any items created should automatically have that parent.
Hi Shawn! Thanks so much for your feedback. Usually filter conditions are applied when new items are added to a filtered view. I’ll double check with our dev team about whether the same is true for subitems / if they can make that happen in the next update or two 🙂