
Checklists are underrated. They are often overlooked and don’t get the snaps they deserve for being an imperative organization and task management tool. Not only are they super practical for learning or remembering set processes, but did you know that they can also help save lives?

With an aim to reduce error by making up for the restrictions of human memory, checklists are a handy tool that can assist in many everyday situations, whether at work, school or at home. Simple to create and even more simple to follow, using one entails following the required steps that have been developed for a particular recurring process, and then checking off an item as you complete it.
Using a Checklist to Optimize Efficiency
The first thing I do when setting out to write a new article, like many other blog writers out there, is to create a pre-writing checklist. Although writing a blog article is something that I’ve done many-a-time, following a checklist helps to ensure that I don’t leave out any vital bit of info, or skip a step in the process (I can hear my editor say to me, “did you include this keyword, and how about that link?”). Along with making sure I don’t forget anything, following a checklist also provides structure, boosts my organization game, and improves productivity.
It doesn’t require much to construct a checklist. In fact, the bare minimum is just a piece of paper and a pen. While there’s absolutely nothing wrong with the old-school method, why limit yourself to one method when there are plenty of other tricks for you to try? For instance, creating an online checklist with Google Sheets.
Creating a Google Sheets Checklist
Google Sheets is a cloud-based spreadsheet offered as part of Google’s Google Drive service along with Google Docs and Google Slides. It is free to use and requires no installation — all you need is an internet connection and a web browser.
Like any other spreadsheet, Google Sheets simulates a paper worksheet by holding data in a tabular format as an electronic document. It also includes features that allow you to catalogue your data in pretty nifty ways. One of those features is a checkbox. By inserting a checkbox beside each of your checklist items, it allows you to create a checklist. Here’s how…
Step 1:
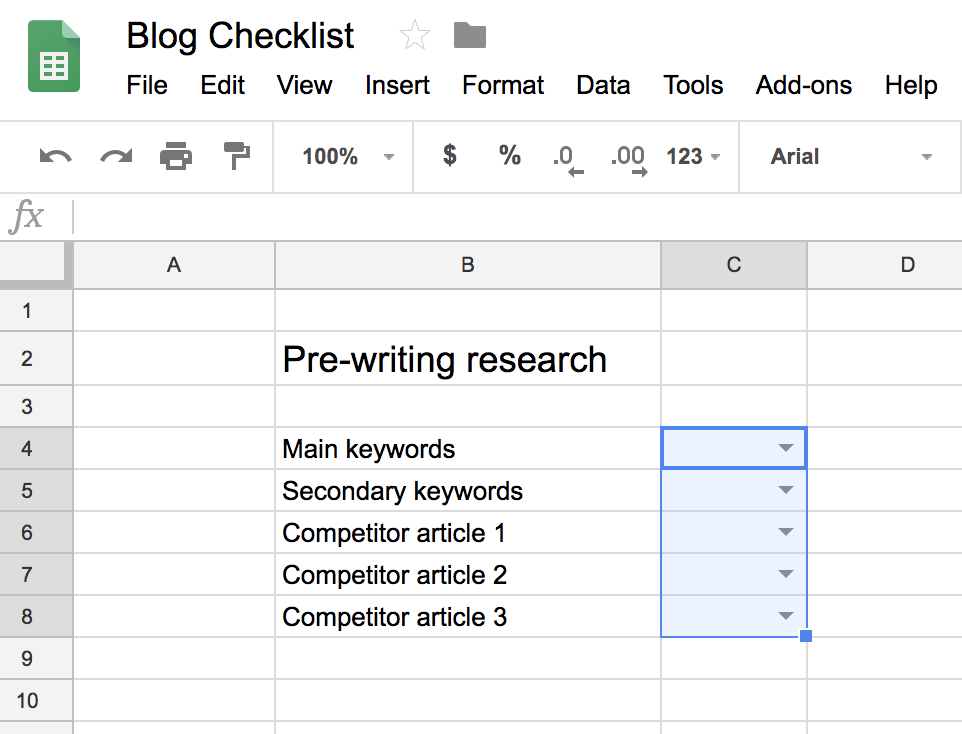
First thing’s first, list the steps/items that are required in the process on a new Sheet. Then highlight the rows on the column to the right of your list of steps/items where you’d like to insert the Google Sheet checkbox feature.
Step 2:
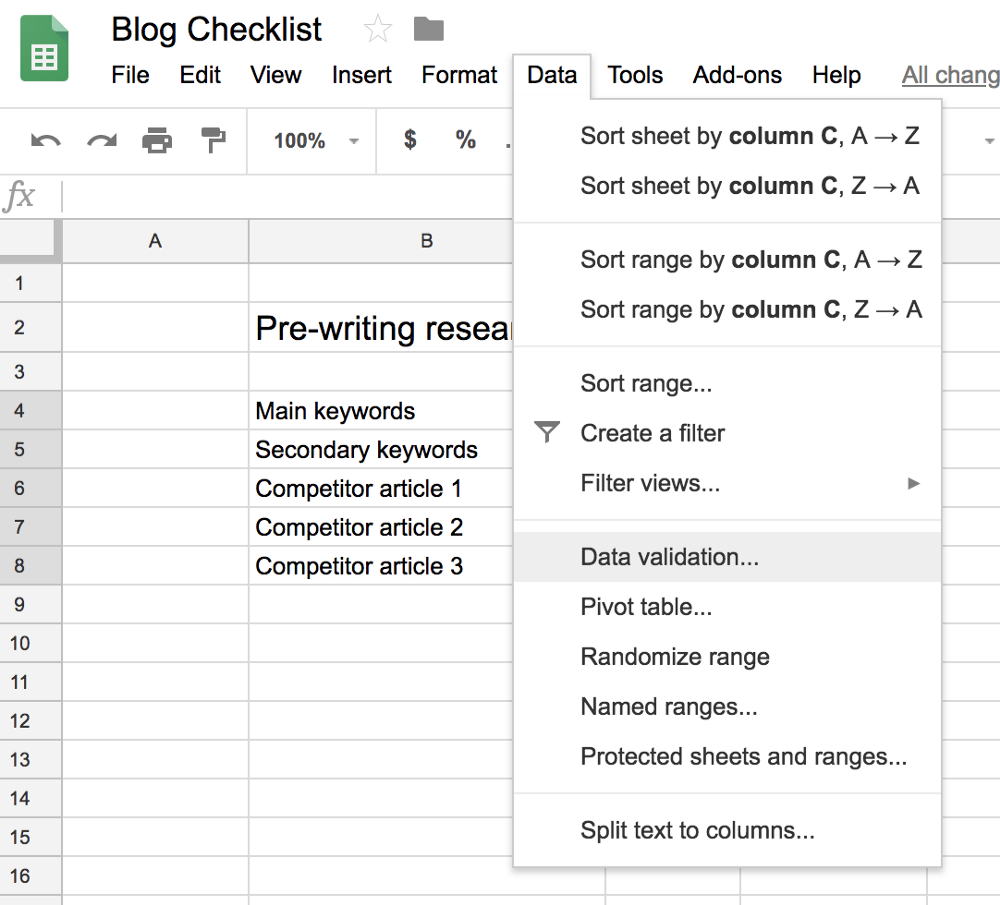
Once the chosen cells are highlighted, click on Data validation, which is found under Data on your toolbox.
Step 3:
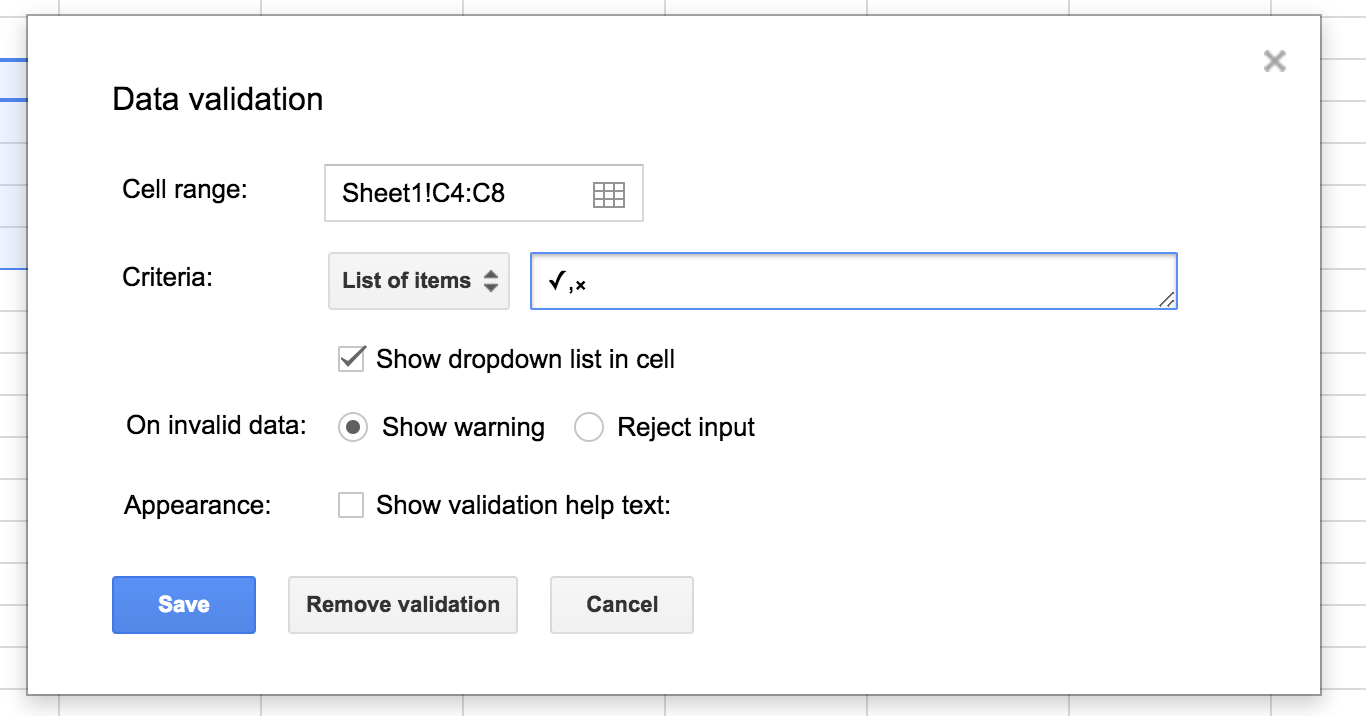
Under Data validation, select ‘List of items’ under the Criteria, and then copy/paste the check and cross characters (we copied the characters from the ‘special characters’ found in Google Docs). Remember to separate the characters with a comma!
Step 4:
Once the settings are saved, a checkbox will appear on the column beside your list for every step. When you click on the dropdown arrow, it will give you the option to select a check or cross character.
Voila! There’s your Google Sheets checklist.
Creating a checklist on Google Sheet is ideal for simple lists. While it works visually, and it does allow you to check off each item as you go along, it is not the most intuitive software if you wanted to create a more complex checklist.
Let’s face it, when writing down the steps of a process, there will be times when you have to rearrange the order, either by intent or accident and when you do so, don’t you want an easier way to do it all rather than having to delete and re-write the list then individually add each checkbox beside it again?
Update: Since this article was originally published, a Google Sheets checkbox feature has been introduced in their Google Sheets service. It can be found under the ‘Insert’ tab.

Stop juggling multiple tools and spreadsheets.
Try our all-in-one project management software for free now!
The Alternative Solution…
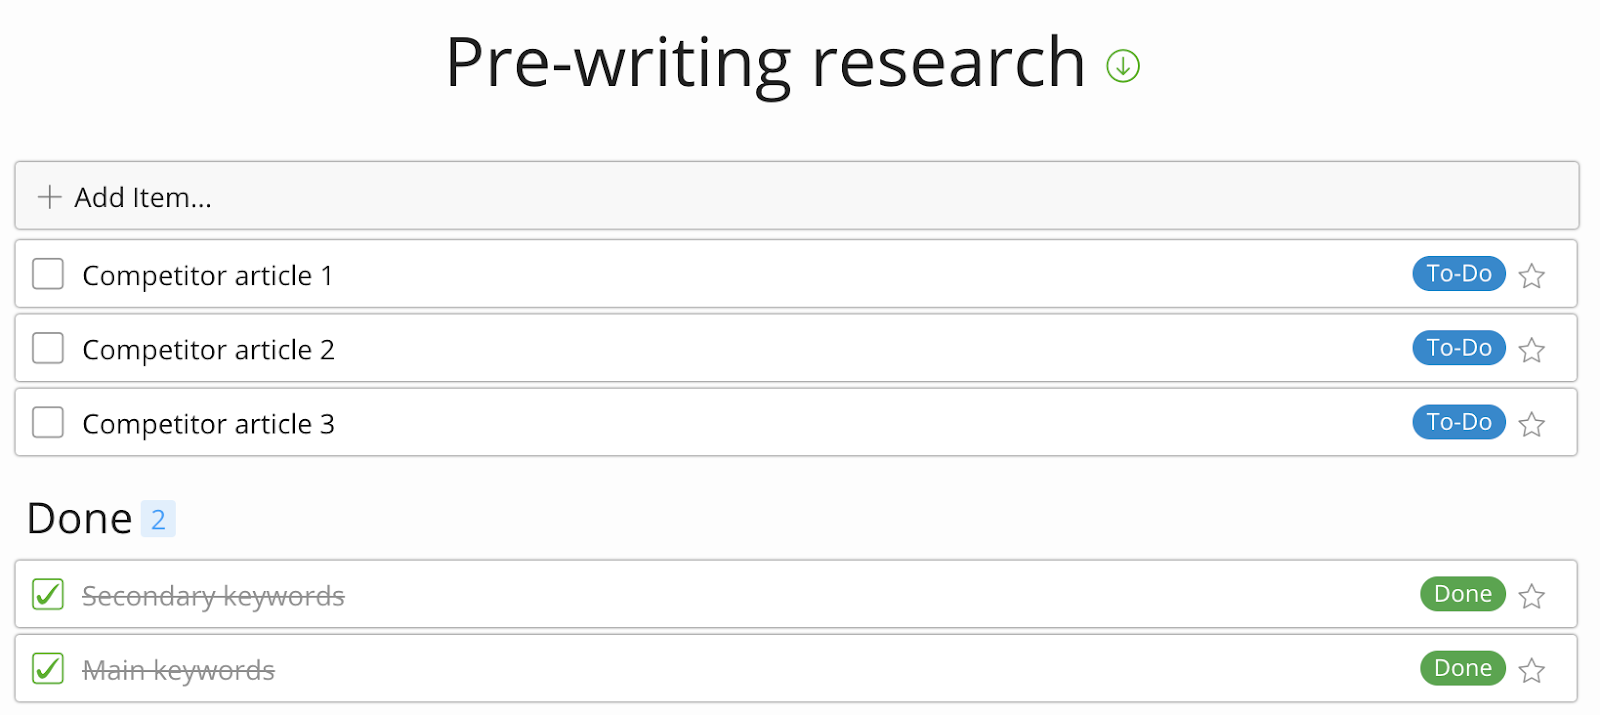
Creating a checklist with Zenkit allows you to track progress visually and mark things off as they’re completed taking little to no steps to do so.
Simply create a new Collection, give it a checklist title, and start listing the steps/items that aren’t to be forgotten. The recommended view, of course, is the ‘List view’, however, the beauty of using Zenkit is that every view — bar the table view — can be turned into a checklist!
To make any Zenkit collection into a checklist, just enable the ‘Task List’ add-on. (Here’s how.)
Checking things off will be a breeze as the feature enables you to tick a box beside the item to mark it as ‘checked’, and then it will automatically move that item down the list — how’s that for prioritizing?
Google Sheets Checklist Template Alternative:
Another cool thing to note is that you can use the checklist collection you set up in Zenkit as a template. Keep a list you’re happy with and use the Clone Collection function to duplicate it whenever you need a new checklist.
Final Thoughts
Using a checklist not only allows you to complete your tasks quicker and accomplish more, but they also allow you to be more creative as having the important steps written down will make room for more creative brain power to be utilized.
So, whether you create a Google Sheets checklist, one on Zenkit, or even use a piece of paper and a pen, it can be a foolproof way to ensure that the task you set out to do gets completed correctly and efficiently.
What do you use a checklist for?
Cheers,
Dinnie and the Zenkit team



Leave a Reply