
Finally see how to stop getting stuck in a project management tool
Book a Live Demo20 min. personalized consultation with a project management expert
How to Organize Stress-Free Summer Vacations
Spend your break #blessed, not stressed

Zenkit is a project management tool, but that doesn’t mean it’s designed for business purposes only! A tool that can also be used for personal productivity, its various collection view options make it great for planning personal tasks and projects—like a vacation.

Planning a vacation is most definitely a project. Think about it: you have activities to coordinate, resources to organize, a budget to adhere to, and a deadline to work against. This is why using a project management tool to put everything in order makes sense. You can track the progress of your planning, cross tasks off your checklist as they’ve been completed, and be reminded of important dates and deadlines.
Most project management products also offer free accounts for individual users, so becoming your own travel agent is as easy as ever.
How to Plan Your Summer Vacation with Zenkit
Where to go?
First things first, you have to decide where to go. There are many elements to consider when selecting your vacation destination. Do you want to go somewhere hot or somewhere tropical? Somewhere vibrant and lively, or somewhere more chilled and relaxing? A great tool to chart all your decision-making and to help you come to a conclusion is a mind map.
Mind maps are ideal to use for exploring ideas as they allow you to utilize brainstorming methods and can offer clear thinking. Here’s how you can use Zenkit’s mind map feature to help you decide on your destination.
Step 1: Create a new collection and select the mind map option. Give your collection a title such as ‘Where to go?’, and then hit the create button.

Step 2: Enter ‘Destination ideas’ as your focal point. You can then branch out with each node representing a place suggestion. We started off with two nodes, ‘Local’ and ‘International’, and then expanded from there.
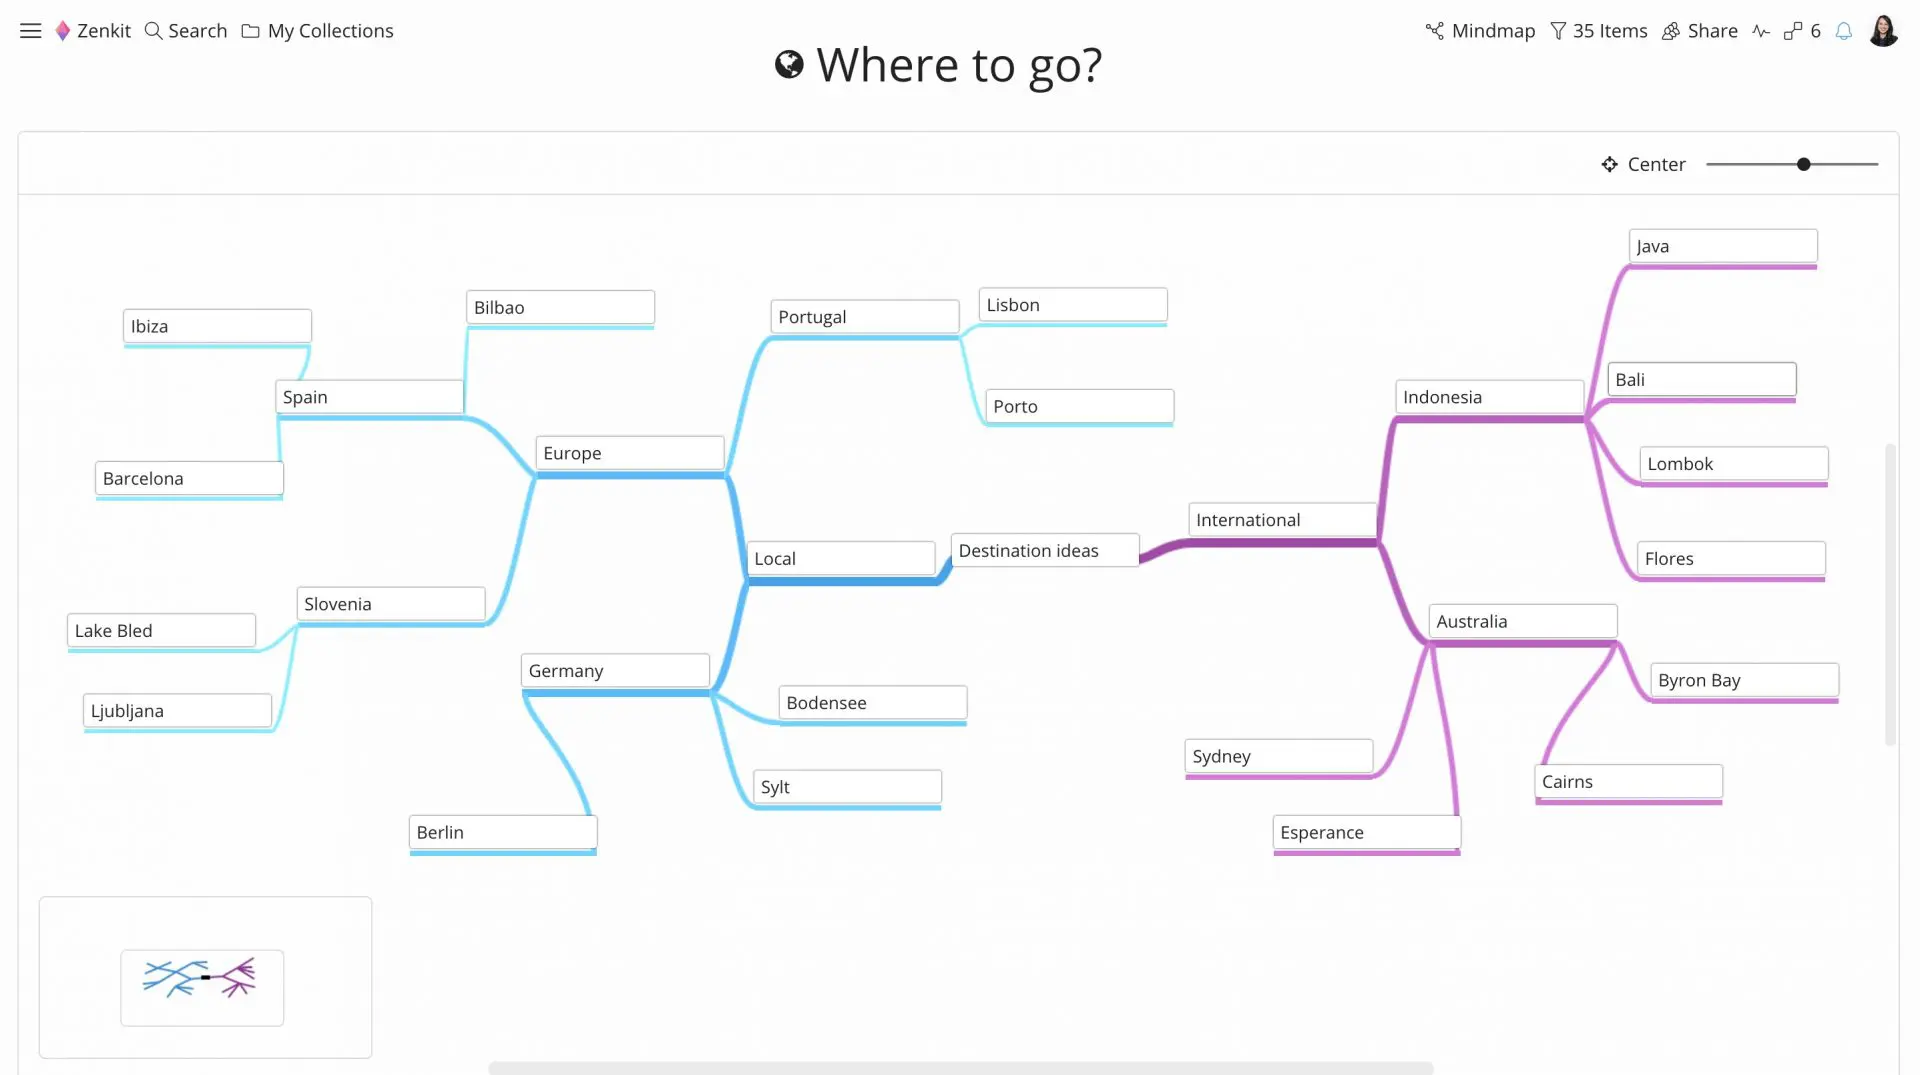
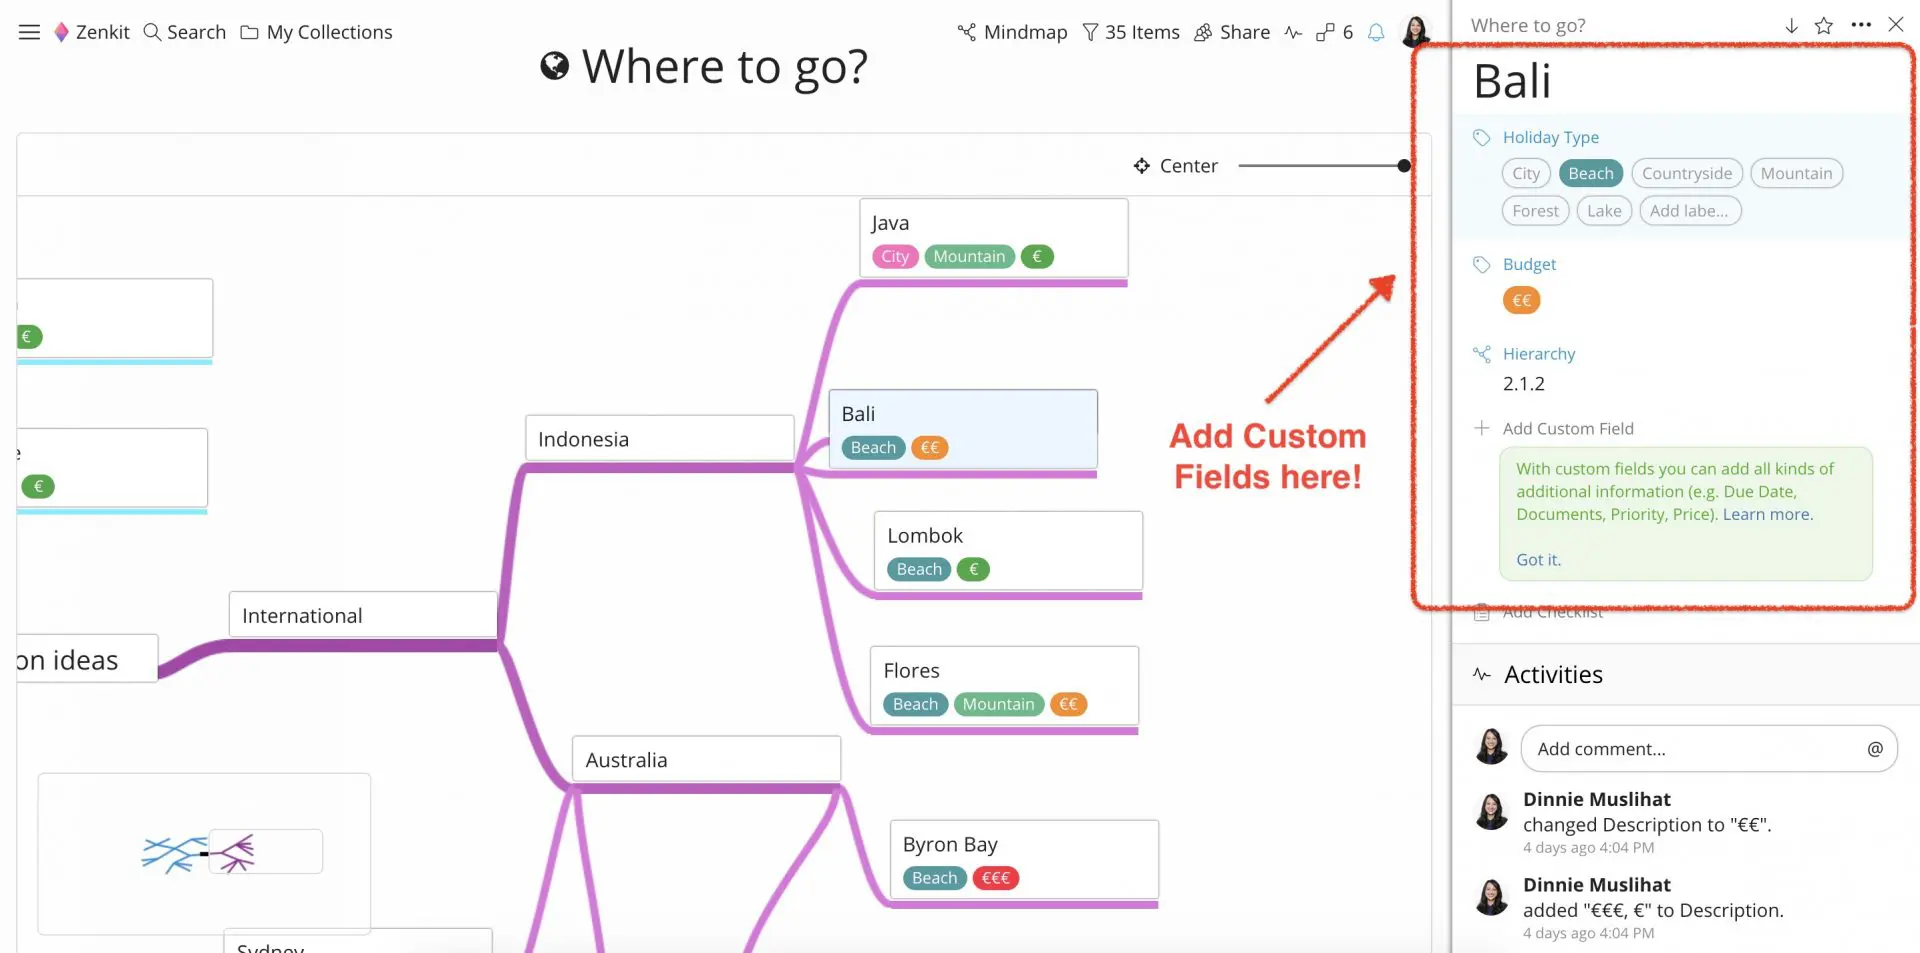
Step 3: Zenkit users will already know that you can use Custom Fields to add extra information for each node. For instance, with every destination idea, we also included the type of holiday it would be and how the place would compare budget-wise.
Holiday planning
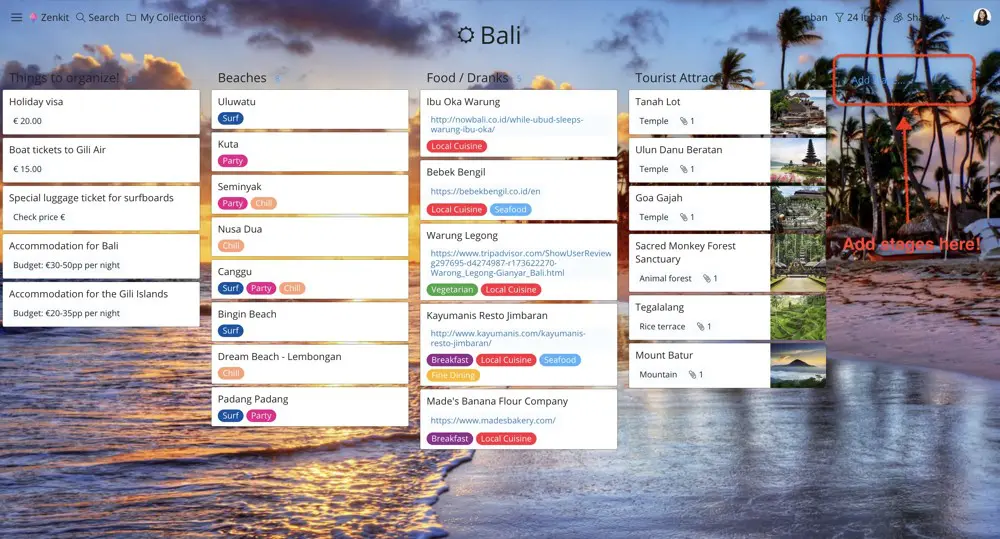
Once you’ve determined where to go, it’s time to pop out the Kanban view for the real planning to commence. A Kanban board visualizes your process—be it a workflow, schedule, or vacation plan—which is why it’s a great tool for documenting tasks, ideas, and activities.
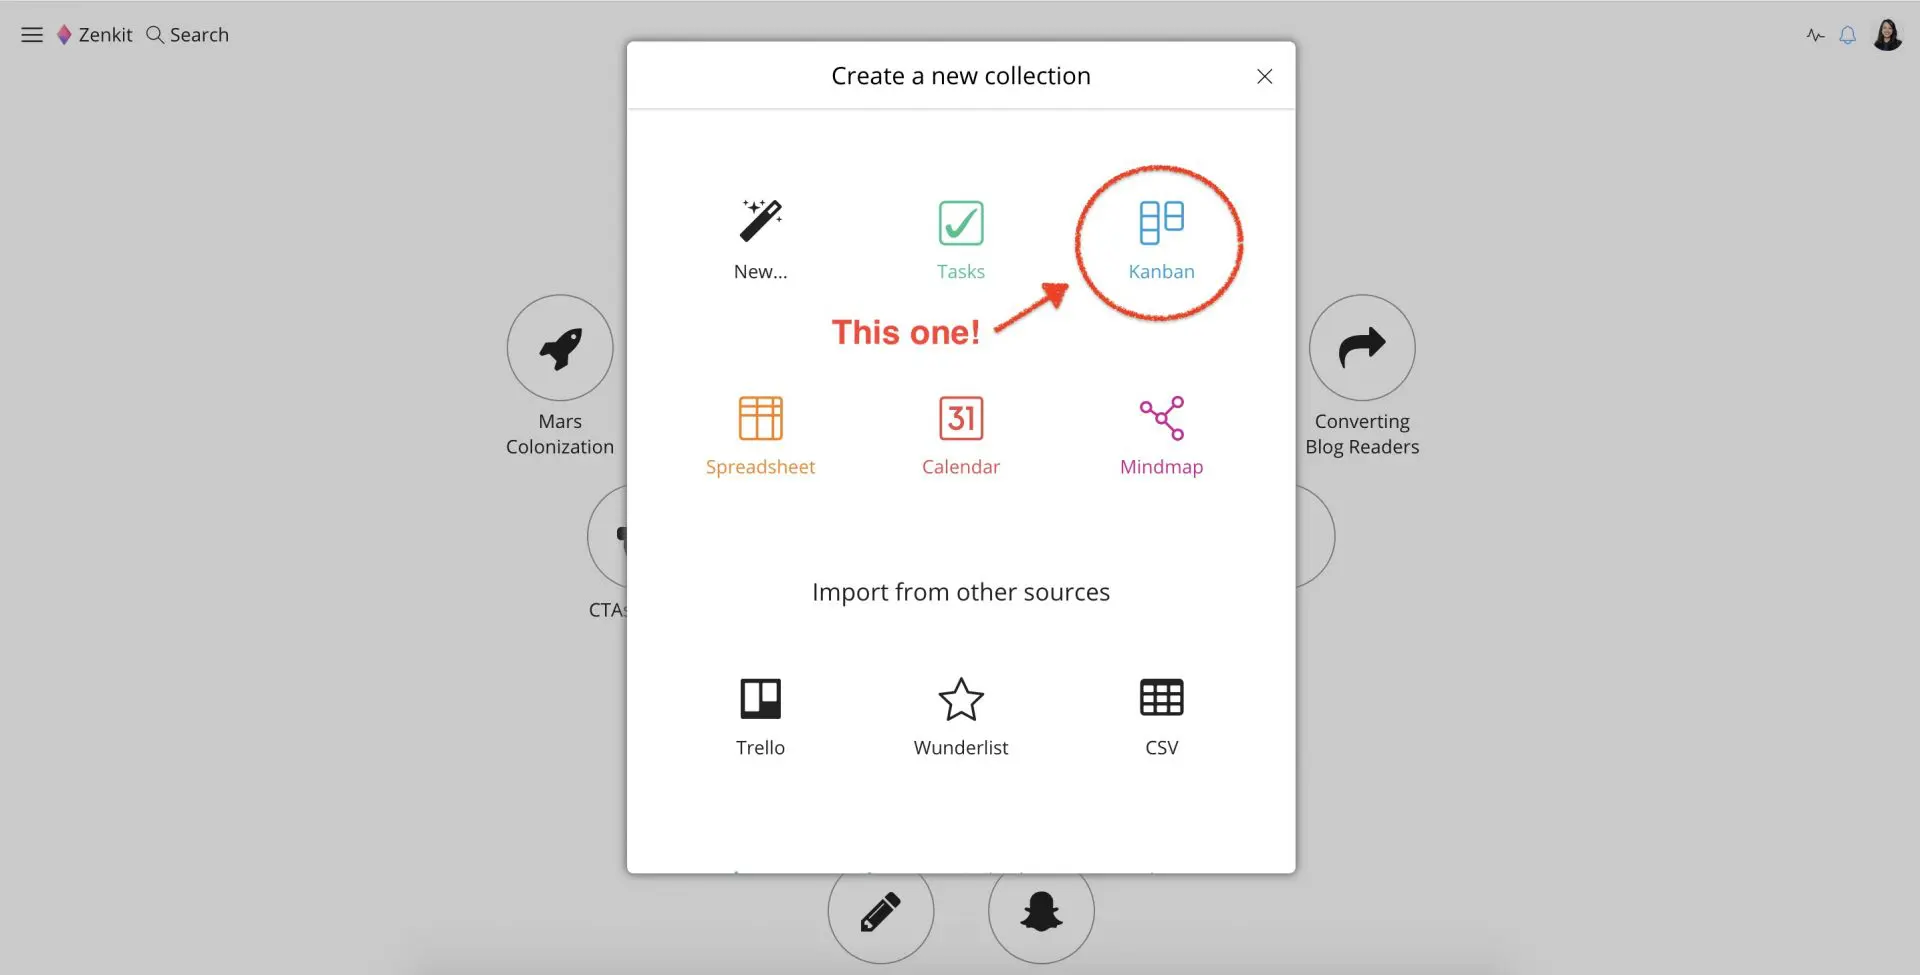
Step 1: Create a new collection and select the Kanban option. Give your collection a title — the name of your destination is always a good idea — and then hit the create button.
Step 2: Your next step is to think about the things that you need to consider to make your vacation as perfect as it can be—things such as documents to organize, activities to book, and sights to see. It’s these factors that will make up the columns on your Kanban board, and within each column, you can list the items accordingly.
To give you an idea, the things we included in our planner were: ‘things to organize’, ‘beaches to check out’, ‘restaurant recommendations’, and ‘attractions to see’. You can, of course, add as many (or as few) columns as you like.
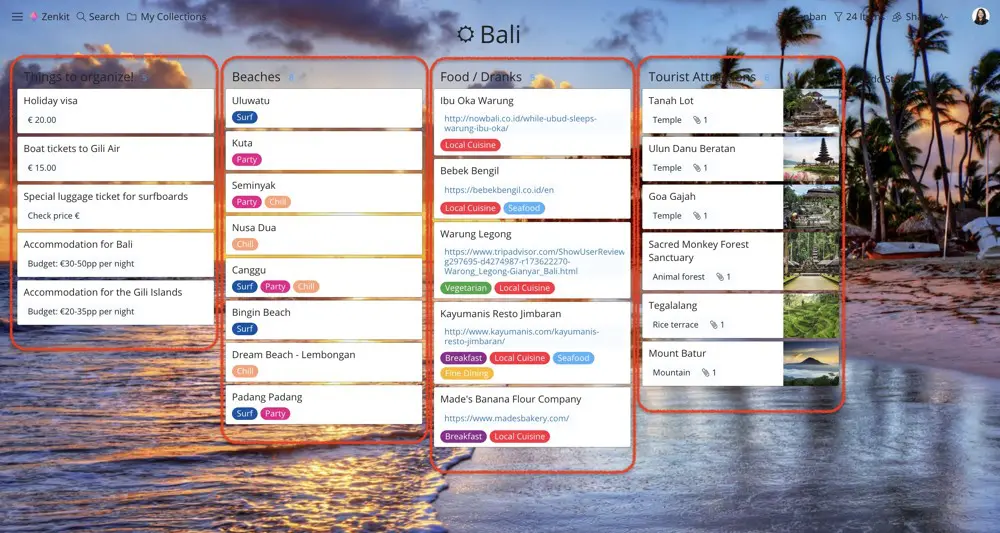
Step 3: Once again, you can utilize the magic of Custom Fields to add extra information to each of your tasks, ideas, and/or activities. Remember that there are 11 Custom Field options to choose from, ranging from hyperlinks to file attachments so that you can optimize your vacation planning.

Kanban best practice is to include a column titled something along the lines of ‘Done’ or Complete’ so that you can move every Kanban card that represents a task, activity, or idea there once it has been achieved. Alternatively, you could also create another column, title it ‘Scrapped’ or ‘Abandoned’, for the things you’ve decided to forgo. There are no cemented rules on how you go about using Kanban. It’s really just a great method that can be applied to help solve any organisation’s woes.
Last-minute checks!
Checklists are an invaluable tool when it comes to planning a vacation. Whether it’s for packing or a pre-flight assessment, here are the steps on how to create one:
Step 1: Like with everything you create in Zenkit, start off by creating a new collection—this time select the tasks option. Don’t forget to give it a name!

Step 2: Building a checklist is pretty straightforward. You just add all the tasks/items you need, then check them off once they’re done. You’ll notice the cool thing about Zenkit lists is that once you check an item off your list, it moves itself to the bottom, allowing the unchecked ones to be prioritized to the top!

A useful thing to note when crafting your checklist is that you can change the default ‘To Do’ and ‘Done’ stage labels to anything you want. Simply click on the Custom Field ‘Stage’, select properties, and enter whatever you see fit. We went for ‘To Pack’ and ‘Packed’ to accommodate our checklist’s purpose.

Planning is the most difficult part of your vacation, and now you’ve got that sorted, you’re ready to enjoy your trip! The beauty of using Zenkit to organize your vacation is that the planning doesn’t have to stop pre-take-off. With the app available to use on mobile and tablet devices, you can have it on hand to ensure that you’re always on top of things. And, if you’re off somewhere that has an unreliable internet connection, you also have the option to save your vacation planning collections and then still access them offline.
Now, go and enjoy your time in the sun, and don’t forget to slip, slop, slap!
We always love hearing the different ways Zenkit is used to help you organize daily life! So, don’t forget to drop us a comment to let us know. 😊
Cheers,
Dinnie and the Zenkit Team
FREE 20 MIN. CONSULTATION WITH A PROJECT MANAGEMENT EXPERT
Wanna see how to simplify your workflow with Zenkit in less than a day?
Book a Live Demo