


A project timeline is a chronological visual representation of tasks related to a project. It can assist project managers in developing an organized workflow. Project managers can use a project timeline to bulk schedule tasks and see what needs to be done and when within a given timeframe.
Ultimately, a project timeline can help project managers reach project goals.
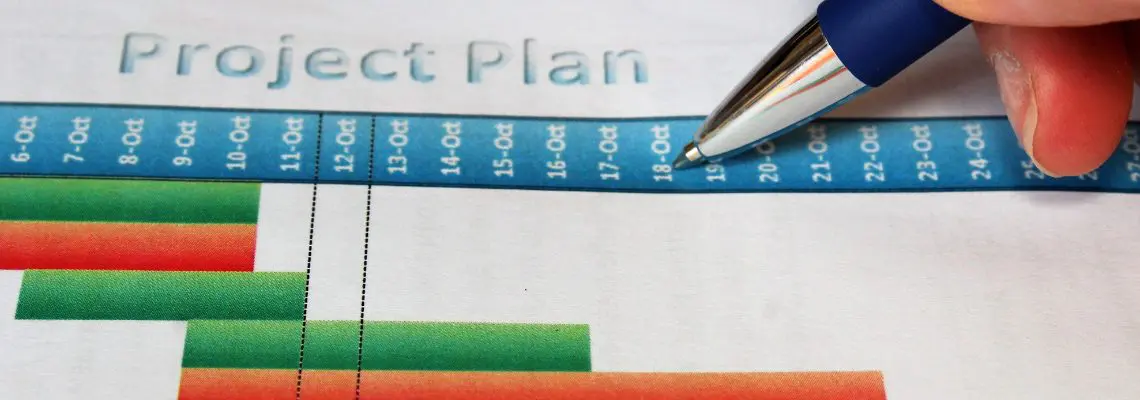
Project Timeline
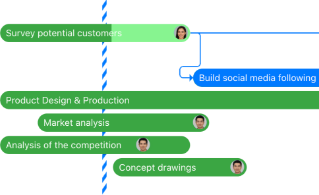
What does a project timeline look like? Depending on the project and those involved, project timelines will differ in appearance and complexity. Here’s a very basic example of a project timeline in Zenkit using the Gantt Chart view:
If only all project timelines were as easy to understand as this one!
Having said that (what a fantastic segue), a project timeline should be presented in a clear visual format so that everyone involved can understand it.
But how do you make one that works?
Here are six steps you should follow to make an effective project timeline:
1. Define the Project Scope
The first step in creating an effective project timeline is defining the scope of your project. You need to define the coverage of your work so you’ll know which tasks to exclude when creating your project timeline.
Scope statements define an effective project scope. The statements will describe how much time each task should take to complete, the project timeline, and any resources you may require to complete your project. Your scope statement data does not have to be based on hard data. Consider the scope statement to be your project’s goal.
For example, if you want to launch a new product, you might start a new project: building a new no-code platform to help with automation. In this case, your scope statement could begin with, “Our teams will create a new no-code platform in four weeks.”
To understand your project scope, you must first define the essential project elements. The first elements are your project objectives, such as what you hope to achieve and how you plan to measure project success.
Your key stakeholders are another project component. A project cannot begin without the participation of the key stakeholders.
Lastly, you need to know your project requirements and limits. Your limits are the things that are not included within the scope of your project.
2. Align Project Tasks with Milestones
Now that you have your project scope statement, you should define your milestones. Your project milestones will help you monitor the progress of your project, right from the start to finish. So, even if you fall behind in one milestone, you’ll have enough time to make adjustments to meet the deadline.
Your milestones can be anything that will work as checkpoints, like events, specific deliverables, or dates. Milestones are especially important if you work on complex projects with different phases.
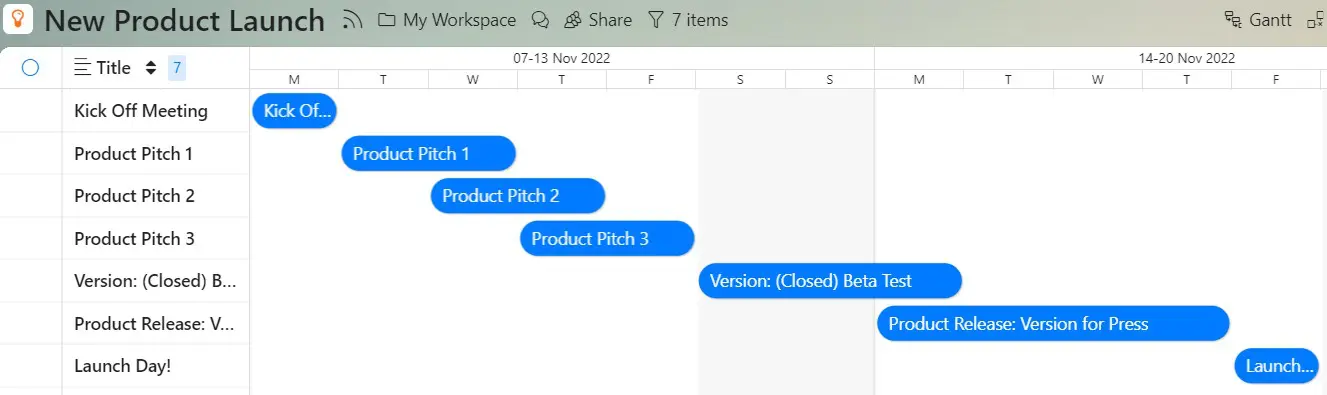
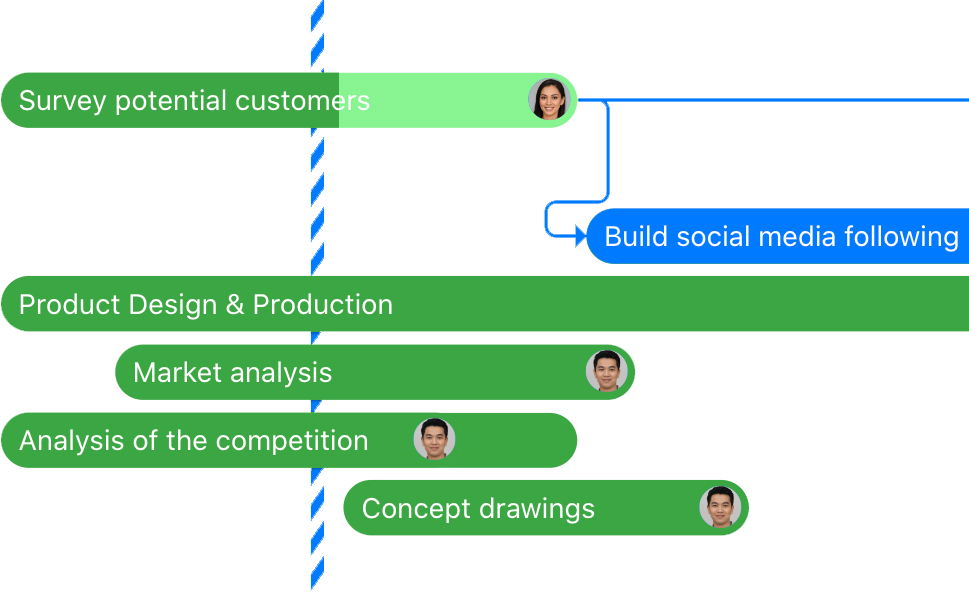
Here’s a simple visualization of milestones using the example project from earlier:
Milestones shouldn’t be treated as deadlines. They should be seen as small victories. Reaching each milestone signals progress. It means you’re on the right track to reaching the end goal.
You need to align your milestones with the specific tasks you need to perform to achieve those milestones in the first place. It’s a pretty straightforward process. Get a milestone and think of the smaller tasks you need to achieve that sub-goal.
Let’s go back to our product launch scope statement. So, the completion of a new no-code platform design can be your team’s first milestone. This process can be further broken down into smaller tasks like the assignment of work to designers, the conduct of market research, plus the actual no-code design process.
3. Assign Tasks
An effective project timeline has to include the exact number and types of resources required for the completion of the project. So if you want to launch a new product with the use of no-code development and automation, your resources would include your no-code building tool, designers, and marketers among others.
Although the word “resources” can mean different things, it is human resources that need the most attention when you’re planning a project. You need to assign each identified task to a team member.
The availability of your team members constantly changes. So, for your project planning process, review your employees’ schedules. Know how much free time they have. You also need to look at their capabilities. You can create a chart like the one below to visualize what they can and cannot do. Knowing these will allow you to match individual tasks with the right team members.
Maximize your team's efficiency with our project management software.
Sign up for free today!
Let’s assume that the task of designing your no-code platform takes a designer several hours. However, your designer assigned to the task is very busy with other ongoing projects, plus has two days booked as holidays. So, based on estimates, they might end up finishing the platform design in a week, and not in a few hours. This means this person may not be the best person to handle the task at that point in time.
As a result, you’d have to delegate the task to someone else with similar skills but more availability.
As a project manager, you might find a tool to track your team’s progress very useful. Monitor your employees’ time utilization and project progress.
4. Perform Effort Estimation
Effort estimation is the process of estimating how much time or money you’ll need to complete your project. The effort estimation can help you determine whether you’re on track to achieving your project goals. That’s why you need to include it in your project timeline and determine it beforehand.
Review your task list to determine how long it will take each person to complete their tasks. There are several ways you can estimate effort for each task or the entire project:
- Expert estimation: Ask the experts how long it will take for them to complete a task.
- Formal estimation: Look at historical data. For example, see how long it took for your team to design previous no-code platforms before.
- Breakdown estimation: Review your task list and evaluate, with your team, how long it will take to complete each task.
When you’ve determined how long each task will take, add them all up to get your effort estimation. If you exceed this estimate, it means that one or more tasks are taking up too much of your time. This means you should assign more people to those tasks or if you have the ability to do so, set aside more time to complete those tasks in particular.
5. Highlight Task Dependencies
Dependencies are tasks that your team can’t start until other tasks have been accomplished. Determining dependencies for complex projects can be challenging. But including those in your project timeline will help you visualize how the entire process should go. It can save you time, and unnecessary stress, plus prevent backlog.
Knowing task dependencies beforehand can also help your team members plan their schedules accordingly.
So, you need to include your task dependencies in your project timeline.
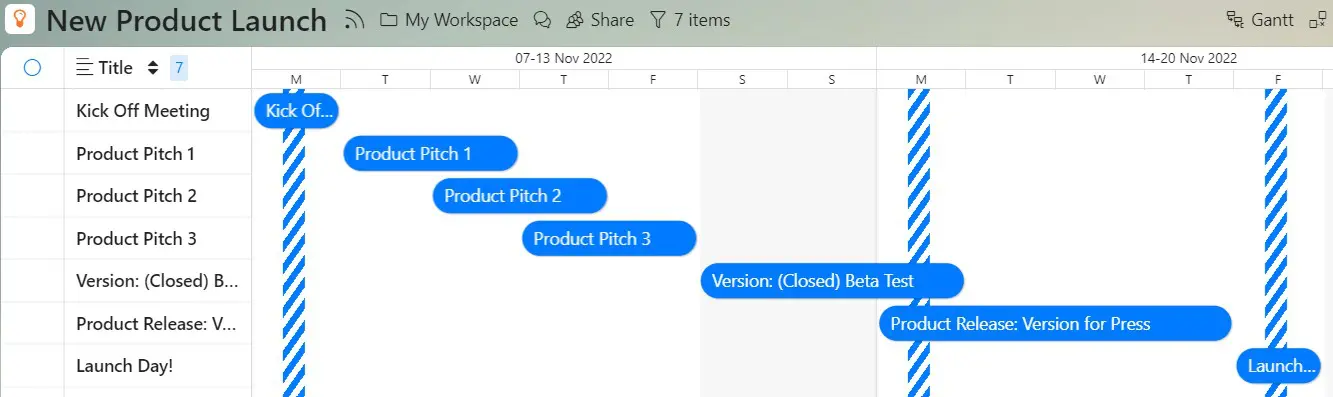
A Gantt chart is a useful way to visualize your task dependencies. The different color bars, like in the screenshot below, illustrate different tasks. You can see which tasks overlap with others.
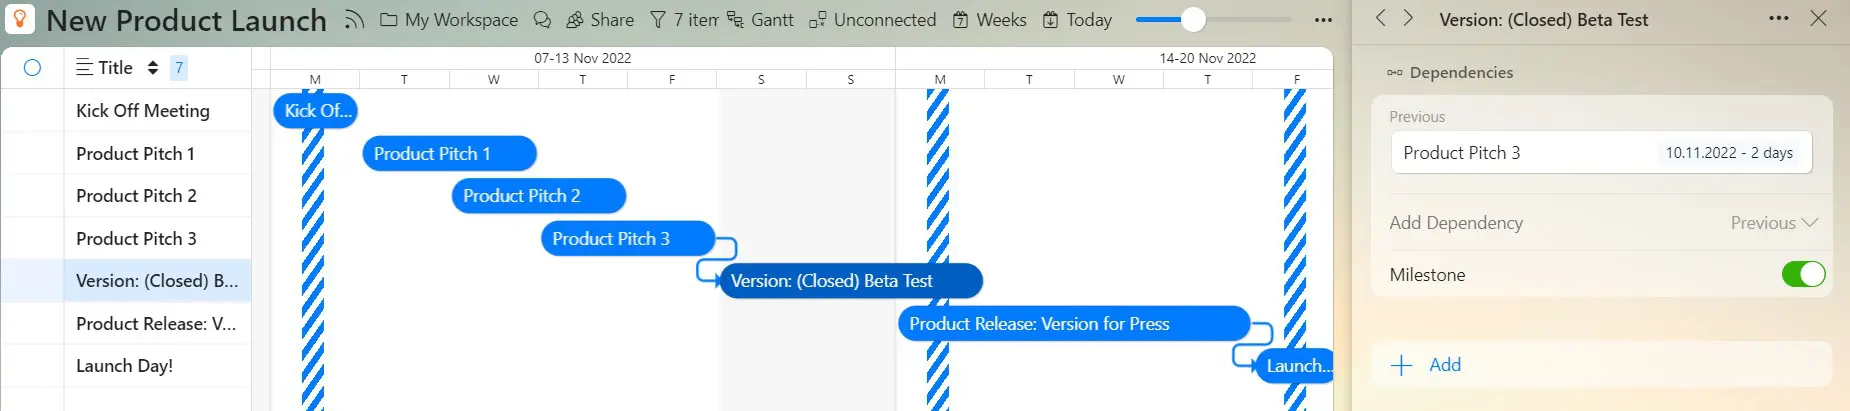
Zenkit can assist you in creating this type of Gantt chart. You can give your team members access to the Gantt chart so they know when to start working on their assigned tasks.
The Gantt Chart view in Zenkit makes project management more visually accessible as well. It accomplishes this through the use of color coding as well as swimlane diagrams to improve project visualization. As a result, you have a better understanding of which teams or individuals are in charge of each task set.
6. Put Everything Together
Now that you have all your data, it’s time to put everything together in your project management timeline. Organize your tasks in chronological order. Label your tasks. Specify which team members will be responsible for the completion of each task. Include in your project timeline the time needed for the tasks to be completed, too. Also, specify key milestones.
Don’t forget to include your task dependency graph in your timeline.
Does it sound like it’s a lot of work? It does because it is a lot of work. But that’s only if you create your project timeline template in a spreadsheet or by using graphical software.
A project management software solution can make the job of creating a project timeline easier for you. Zenkit allows teams to create custom workflows with just one click. You can create a project timeline with all the variables you need to know in no time.
Final Thoughts: Creating a Project Timeline
Effective timelines make it easier for project managers to keep the entire project on track. Creating an effective project timeline will also help your team understand your expectations. It will also give stakeholders a realistic projection for the project.
So, define the scope of your project. Align project tasks with milestones and assign tasks. Then go ahead with your effort estimation. Highlight task dependencies. Then finally, put everything together in your final project timeline. You can skip many steps and just use project management software like Zenkit to make creating your project timeline easier.
With an effective project timeline, you can ensure efficiency, deployment, and collaboration. You’ll complete your project in no time.
Create a Project Timeline with Zenkit
Zenkit is a multi-project management solution designed to support traditional or Agile methodologies. It’s also the little brother of Zenkit Base!

Zenkit has been carefully designed to get your project started and keep it running from sprint to sprint until the ‘end of project’ report is due. This project management tool has many features that make a good project management tool great! Projects has different project views, a 360-degree dashboard to track task and project progress, and also in-depth resource management and dedicated reporting.
It’s also a great place to create your own project timeline!
With many intuitive features and a focus on real-time team collaboration, Zenkit Project is the ideal place to get your project from “planning” to “complete”.
So, once you’ve created your project timeline with Projects, you can use To Do to create tasks, Hypernotes to create knowledge bases, Base to structure work, Zenchat to communicate with your team, and Zenforms to improve client and team feedback!
The Zenkit Suite is free to use! Sign up today to get your project started.
About the Author: Michal Leszczyński is immersed in developing, implementing, and coordinating all manner of content marketing projects as the Head Of Content Marketing & Partnerships at GetResponse. He has 10-plus years of expertise in online marketing with a Master of Science Degree in Strategic Marketing and Consulting from the University of Birmingham (UK). Michal is the author of more than 100 articles, ebooks, and courses for both GetResponse and renowned websites like Crazy Egg and Social Media Today.


Leave a Reply