Send Items Directly to Zenkit with Our New Email-to-Collection Feature!
Create items in any collection by sending a simple email
We’re so happy to announce that the long-awaited email-to-collection feature is now available to all Plus users! 🎉
With email-to-collection, you can create new items by sending an email to your collection’s unique email address. If you want to take it up a notch, you can add a member’s username to the email to automatically assign the email to them!

Yeah… it’s pretty cool.
Here’s how you can use it:
- Triage your emails and send all to-dos to the right collections.
- Share the email address with other people so they can e.g. send feedback on a product directly to a feedback collection.
- Forward actionable emails to your GTD Inbox.
- Send new leads to a sales lead collection.
- Create a guest list from responses to your email invitations…
- … and million other ways!
Enabling Email-to-Collection
E2C is a collection-level add-on, just like the Task List and Calendar Sync add-ons. To enable it, click on your collection’s name, then ‘Properties’.
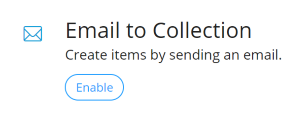
Go to the ‘Add-ons’ tab, then click on ‘Enable’ under ‘Email to Collection’.
Get Your Collection’s Email Address
When you click ‘Enable’, it’ll open a new box that shows the email address and all of the settings. The first thing you’ll see at the top is a box containing the collection’s email address. This is the basic address that will create items in your name since your username is included at the front of the address.
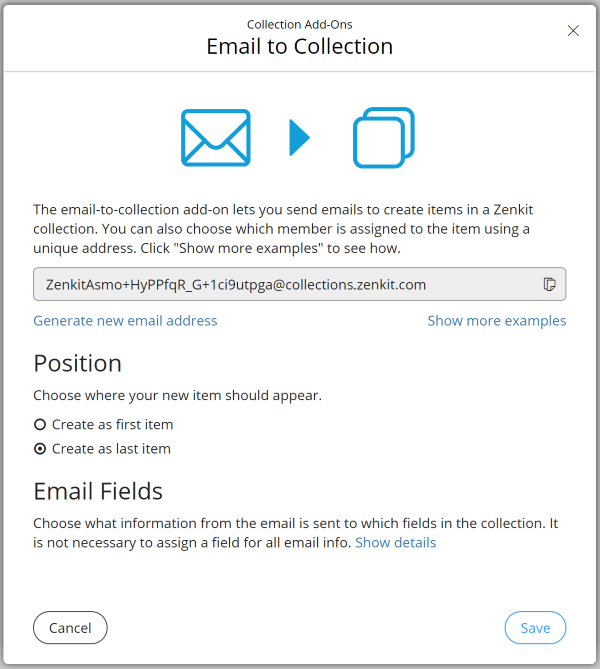
To assign another user to the new item, you just need to add their username after yours, like this: yourname+theirname+…
Click on ‘Show more examples’ to see examples of this for assigning an item to yourself, and to someone else in your collection.
Email-to-Collection Settings
You can choose how and where information from your email appears in your collection.
Position
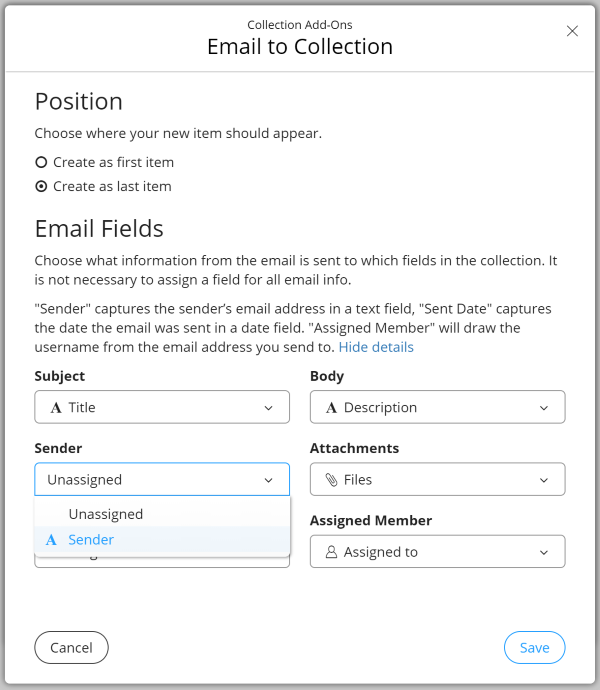
The ‘Position’ section refers to where the new item should land inside your collection. In the list and table views, this means that the item will appear at the top or the bottom of the list/table. In Kanban view, if you’ve set a default label, it will appear at the top or the bottom of that list. If you don’t have a default label applied, it’ll appear in a new ‘no label assigned’ list. It won’t appear in the calendar view unless you choose to include the ‘Sent Date’ (more on that later), and it will appear in the ‘unconnected’ panel of the mind map view.
Email Fields
There are a few fields set up by default but you can customize how email information is added to items, just click on ‘Show details’. By default, the subject line becomes a new item title, the email body lands in the first text field in your collection, and attachments will be sent to the first file field on your item. You can change all of this, of course!
The ‘Sender’ field will take the sender’s email address and add it to a text field in the collection. Note: You can’t choose the same text field multiple times, so if you only have one text field in your collection and you want to have the email body & sender, then you need to create another text field to contain that info.
The ‘Sent Date’ field takes the date the email was sent and adds it to a date field. The ‘Assigned Member’ field assigns the user you specify in the email address you sent to (i.e. the second username included in the email address, as explained above).
To change any of the fields, click on the drop-down menu and select the field you want the info to land in.
Learn more about how to use it in our documentation.
Best Practices
The best thing to do is to save the collection email address directly to your contacts, that way, you just start typing the name of the collection into the ‘To’ field of your email, and it’ll autocomplete with the full address!

We hope you enjoy using Email to Collection! If you have any brilliant ideas about how to use it, leave a comment below and let us know!
Cheers,
Siobhan and the Zenkit Team
FREE 20 MIN. CONSULTATION WITH A PROJECT MANAGEMENT EXPERT
Wanna see how to simplify your workflow with Zenkit in less than a day?
Book a Live Demo